PHP跟JS位移操作的区别

JS代码

console.log(193449512 << 5);

输出结果

JS执行结果

PHP代码

echo 193449512 << 5;echo "\n";

输出结果

PHP执行结果

为什么结果会不一样呢?首先怀疑的是PHP的位数是不是32位导致的,看了下PHP信息排除了。

搜索了一番信息,才找到原因。

js 在进行二进制运算时,使用 32 位二进制整数。

而我本机的PHP是64位,所以导致两种运算的结果不一致。

解决方法:

$a = 193449512;
$bin = decbin($a);
$bin = str_pad($bin, 32, '0', STR_PAD_LEFT);

echo bindec(str_pad(substr($bin, 5), 32, '0', STR_PAD_RIGHT));
echo "\n";

// output 1895417088

重新编译PHP7支持PostgreSQL

安装PostgreSQL

apt-get install postgresql postgresql-contrib postgresql-server-dev-9.3 libpq-dev

编译PHP增加PostgreSQL扩展

  1. 先看下之前编译的configure命令。

        php -i | grep configure
  2. 配置编译参数。在上面的configure命令后面加上--with-pdo-pgsql选项。

    ./configure --prefix=/usr/local/php7 --exec-prefix=/usr/local/php7 --bindir=/usr/local/php7/bin --sbindir=/usr/local/php7/sbin --includedir=/usr/local/php7/include --libdir=/usr/local/php7/lib/php --mandir=/usr/local/php7/php/man --with-config-file-path=/usr/local/php7/etc --with-mysql-sock=/var/run/mysql/mysql.sock --with-mcrypt=/usr/include --with-mhash --with-openssl --with-mysqli=shared,mysqlnd --with-pdo-mysql=shared,mysqlnd --with-gd --with-iconv --with-zlib --enable-zip --enable-inline-optimization --disable-debug --disable-rpath --enable-shared --enable-xml --enable-bcmath --enable-shmop --enable-sysvsem --enable-mbregex --enable-mbstring --enable-ftp --enable-gd-native-ttf --enable-pcntl --enable-sockets --with-xmlrpc --enable-soap --without-pear --with-gettext --enable-session --with-curl --with-jpeg-dir --with-freetype-dir --enable-opcache --enable-fpm --with-fpm-user=www --with-fpm-group=www --without-gdbm --disable-fileinfo --with-pdo-pgsql=/usr/lib/postgresql/9.3
  3. 开始编译和安装。

    make && make install
  4. 安装完成后,检查PHP扩展。

    php -m | grep pdo_pgsql

    输出里有pdo_pgsql,就表示PostgreSQL的扩展ok了。

使用SimpleXML输出rss内容

代码说话。

    header('Content-Type: application/xml', true); //set document header content type to be XML

    $rss = new SimpleXMLExtendedModel('<rss xmlns:dc="http://purl.org/dc/elements/1.1/" xmlns:content="http://purl.org/rss/1.0/modules/content/" xmlns:atom="http://www.w3.org/2005/Atom"></rss>');
    $rss->addAttribute('version', '2.0');

    $channel = $rss->addChild('channel'); //add channel node

    $atom = $channel->addChild('atom:atom:link');
    $atom->addAttribute('href', '你的RSS链接');
    $atom->addAttribute('rel', 'self');
    $atom->addAttribute('type', 'application/rss+xml');

    $channel->addChild('title', 'RSS标题');
    $description = $channel->addChild('description', 'RSS描述');
    $link = $channel->addChild('link', '你的RSS链接');
    $language = $channel->addChild('language', 'zh-Hans');

    $lastBuildDate = new DateTime($date . ' 02:00:00');
    $channel->addChild('lastBuildDate', $lastBuildDate->format(DateTime::RSS));
    $channel->addChild('pubDate', $lastBuildDate->format(DateTime::RSS));

    $generator = $channel->addChild('generator', '创建者');

    // $result 为数据库查询结果
    foreach ($result as $data) {

        $item = $channel->addChild('item');
        $item->addChild('title', 'item的标题');
        $link = $item->addChild('link', 'item的链接');
        $guid = $item->addChild('guid', 'item的链接');
        $guid->addAttribute('isPermaLink', 'true');

        $item->addChild('description')->addCData('item的描述');

        $item = $item->addChild('pubDate', $lastBuildDate->format(DateTime::RSS)); //add pubDate node
    }

    echo $rss->asXML();

期间遇到CDATA的问题,解决方案新增一个扩展类。

class SimpleXMLExtendedModel extends SimpleXMLElement {

    public function addCData($cdata_text) {

        $node= dom_import_simplexml($this);
        $no = $node->ownerDocument;
        $node->appendChild($no->createCDATASection($cdata_text));

        return true;
    }
}

使用Datadog服务监控php-fpm进程信息

Datadog是什么?

Cloud Monitoring as a Service —— 摘自官网
Datadog是一个一站式云端性能监控平台。
  1. 在datadog官网注册一个账号。
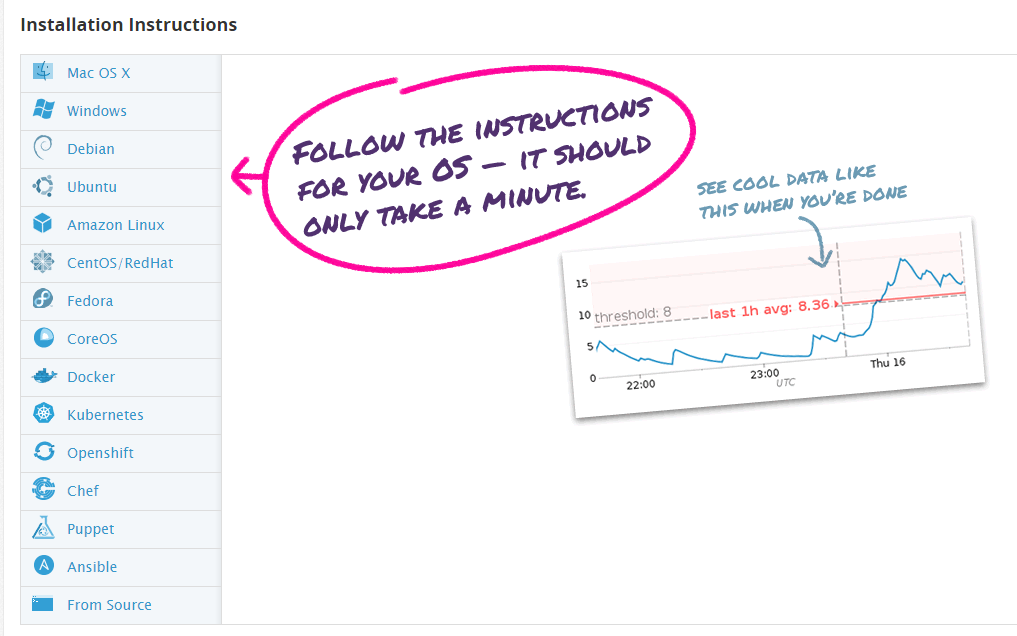
    注册过程中需要在服务器上安装Datadog的agent进程,选择服务器的平台,执行对应的命令即可。

    安装agent

  2. 在datadog上添加php-fpm。
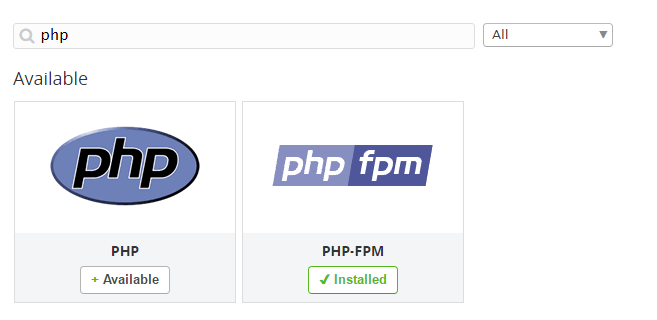
    进入integrations页面,搜索PHP,在结果里移动到php-fpm上,点击install安装。

    添加php-fpm

- 阅读剩余部分 -

使用Slack和Hubot搭建自己的机器人

五一假期在微博上看到「湾区日报」用户发的「湾区日报是如何运作的?」,里面提到了他是如何使用Slack进行自动化的工作。
于是想着自己也搞一个自动化的机器人,本来想着使用微信公众号进行开发,但是苦于没有认证无法使用高级接口,遂作罢。

1. 在Slack上创建一个Bot帐号

进入Slack官网创建App页面

Build your own

- 阅读剩余部分 -